Introduction
Are you looking to add some greenery to your home while also saving space? A hanging herb planter is the perfect solution! Not only does it provide a convenient way to grow your favorite herbs, but it also adds a touch of beauty to any room. In this step-by-step guide, we will walk you through the process of creating your very own hanging herb planter.
Materials You’ll Need
To get started, gather the following materials:
– A wooden board or pallet
– Mason jars or small pots
– Rope or chain
– Hooks or brackets
– Screws
– Drill
– Potting soil
– Herb seeds or seedlings
– Watering can
Step 1: Prepare the Wooden Board
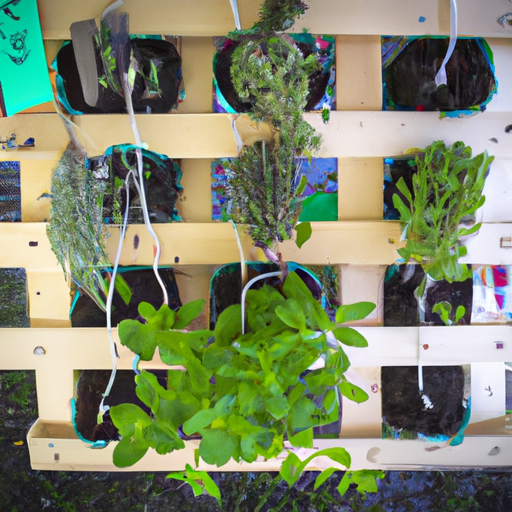
Begin by selecting a sturdy wooden board or pallet that will serve as the base for your hanging herb planter. Make sure it is clean and free from any rough edges. Sand it down if necessary to create a smooth surface.
Step 2: Attach the Hooks or Brackets
Next, determine where you want to hang your herb planter and attach the hooks or brackets accordingly. Ensure they are securely fastened to the wall or ceiling, as they will be supporting the weight of the planter.
Step 3: Drill Holes for the Mason Jars or Pots
Using a drill, create holes in the wooden board or pallet to accommodate the mason jars or pots. The size of the holes should be slightly smaller than the diameter of the containers to ensure a snug fit.
Step 4: Secure the Mason Jars or Pots
Place the mason jars or pots into the holes you just drilled. If necessary, use screws or additional support to secure them in place. Make sure they are evenly spaced and level.
Step 5: Fill with Potting Soil
Fill each mason jar or pot with potting soil, leaving about an inch of space at the top. This will provide enough room for watering and prevent overflow.
Step 6: Plant Your Herbs
Now it’s time to plant your herbs! Choose your favorite varieties and carefully transfer the seedlings or sow the seeds directly into the potting soil. Follow the instructions on the seed packets for proper planting depth and spacing.
Step 7: Hang and Water
Once your herbs are planted, hang the wooden board with the attached mason jars or pots on the hooks or brackets. Ensure it is level and secure. Water your herbs regularly, keeping the soil moist but not overly saturated.
Step 8: Enjoy Your Hanging Herb Planter
Congratulations! You have successfully created your very own hanging herb planter. Now, all that’s left to do is sit back, relax, and enjoy the beauty and convenience of having fresh herbs right at your fingertips.
In conclusion, making a hanging herb planter is a fun and rewarding DIY project that allows you to bring nature indoors. By following these simple steps, you can create a stunning herb display that not only adds a touch of greenery to your home but also provides you with fresh herbs for cooking and other purposes. So, why wait? Get started on your hanging herb planter today and elevate your home decor to a whole new level!